📦 Request Quote
📞 Connect with us
Learn the correct drywall screw driving depth, how to avoid overdriven and underdriven screws, and protect gypsum board paper for a strong, professional installation.
A practical guide to correct drywall screw depth, common driving mistakes, and proper installation techniques.

How Deep Should Drywall Screws Go? Correct Driving Depth Guide
Correct drywall screw driving depth is essential for a secure gypsum-board installation and a smooth finished surface.
A properly driven screw should pull the board firmly against the framing while keeping the paper facing intact. If the screw is driven too deeply, it can tear the paper and weaken the fixing point. If it is not driven far enough, the raised screw head may interfere with joint compound and finishing.
This guide explains how deep drywall screws should go, how to identify correct, overdriven and underdriven screws, and how to inspect and correct the installation before finishing.
Looking for reliable drywall screws for your next project or bulk requirement?
🟨 Request Bulk Quote
📘 Download Product Catalogue
📦 Explore Our Product Range
📞 Talk to Our Sales Team
Quick Answer: How Deep Should Drywall Screws Go?
A drywall screw should be driven until the head sits slightly below the gypsum-board surface and creates a shallow recess.
The screw head should:
• Sit just below the board surface
• Leave the surrounding paper facing intact
• Hold the board firmly against the framing
• Remain deep enough to receive joint compound
• Avoid cutting through the paper into the gypsum core
The correct result is a small, controlled dimple—not a raised screw head and not a deep hole.
Screw condition | What it looks like | Correct action |
Correct depth | Slight recess with intact paper | Leave in place |
Underdriven | Head remains flush or raised | Carefully seat it slightly deeper |
Overdriven | Paper is torn around the head | Add a replacement fixing into sound framing nearby |
Spinning screw | Screw turns without tightening | Remove it and relocate into sound framing |
Important: Final screw-driving requirements should follow the approved gypsum-board system, project specification and board manufacturer’s installation instructions.
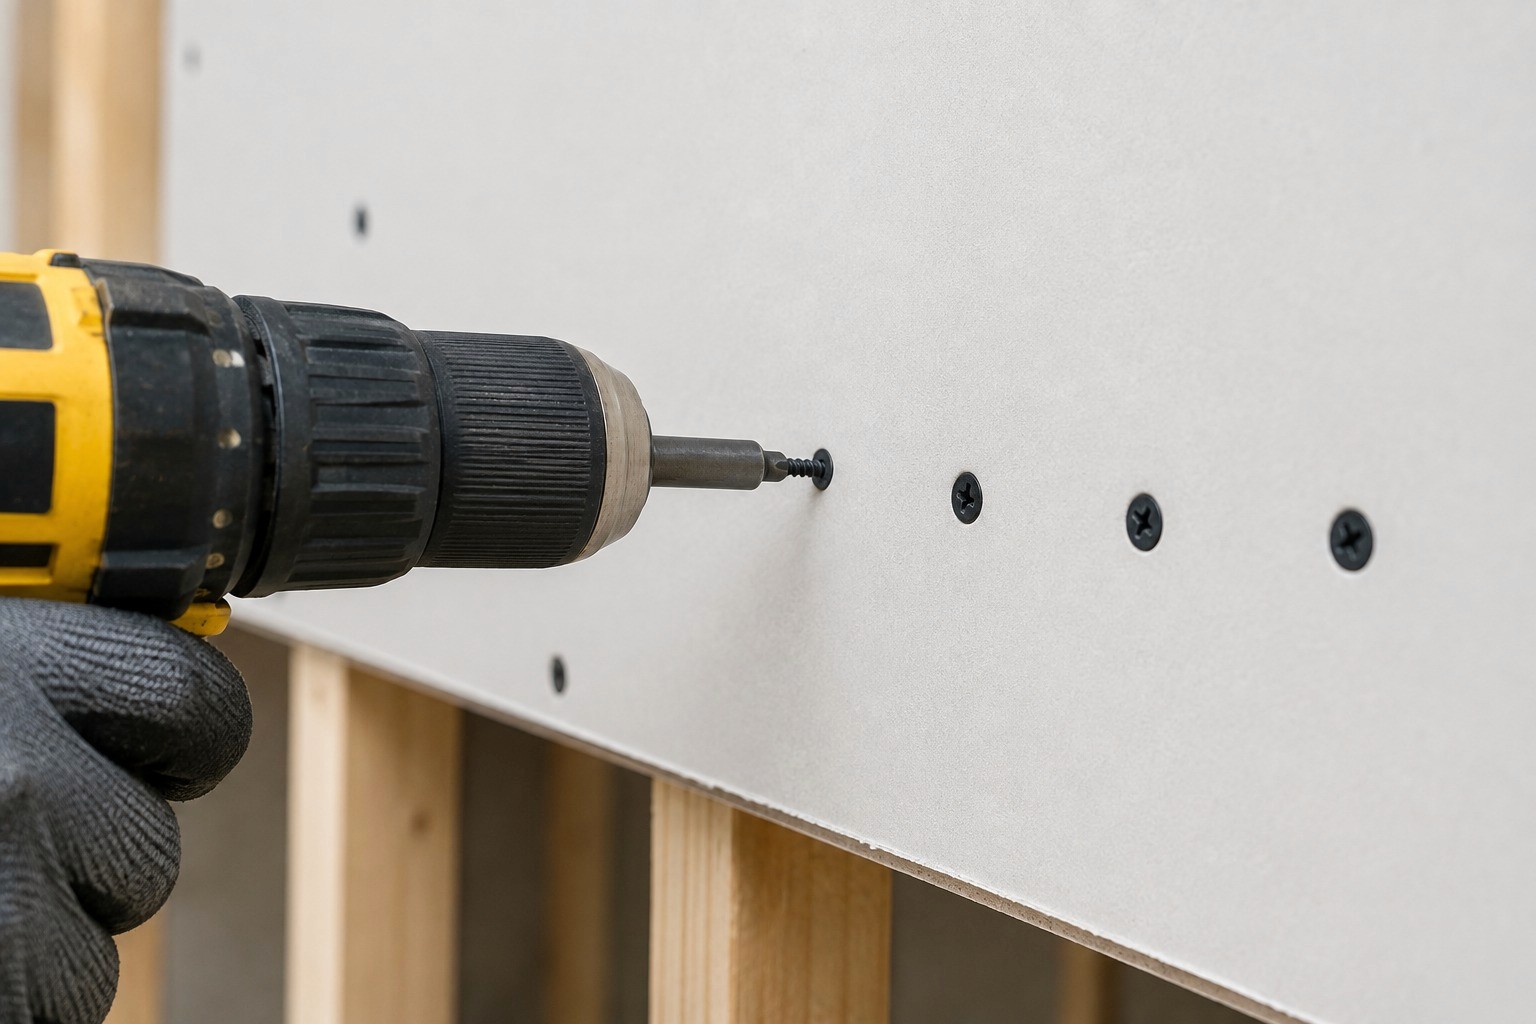
What Correct Drywall Screw Depth Looks Like
A correctly driven drywall screw creates a shallow depression that can be covered smoothly with joint compound.
The screw should not remain level with or above the board surface. At the same time, it should not be driven so deeply that the bugle head breaks through the paper facing.
A properly driven screw normally has these characteristics:
• The head is slightly recessed
• The surrounding paper is unbroken
• The board is tight against the stud, joist or channel
• The screw does not spin
• The fixing point feels firm
• The surface is ready for finishing
The paper facing helps support the screw head. Once the paper is torn, the fixing may lose part of its holding strength.
Looking for reliable drywall screws for your next project or bulk requirement?
🟨 Request Bulk Quote
📘 Download Product Catalogue
📦 Explore Our Product Range
📞 Talk to Our Sales Team
Why the Gypsum-Board Paper Must Remain Intact
Gypsum board consists of a gypsum core covered by paper facing.
When a drywall screw is installed correctly, the bugle head presses slightly into the board surface and spreads the load across the paper.
If the screw tears through the paper:
• The head may enter the softer gypsum core
• The fixing point may become weaker
• The board may move around the screw
• A visible defect may appear later
• Joint finishing may become more difficult
• A replacement fixing may be required
The paper should therefore be compressed slightly, not broken.
A shallow recess with undamaged paper provides enough space for joint compound while preserving the fixing point.
Overdriven Drywall Screws
An overdriven drywall screw is driven too deeply into the board.
Instead of forming a controlled recess, the screw head breaks through the paper and enters the gypsum core.
Signs of an overdriven screw
• Torn or broken paper around the head
• A deep hole in the board
• Gypsum dust around the fixing
• Screw head buried below the paper layer
• Loose board around the fixing point
• Visible surface damage
Common causes of overdriving
• Excessive pressure on the screw gun or drill
• High driving speed
• Incorrect depth-control setting
• Continuing after the head is already seated
• Using a tool without suitable depth control
• Worn or slipping driver bit
• Damaged board surface
• Failing to hold the board against the framing
Why overdriven screws are a problem
When the paper is torn, the screw head may no longer have proper surface support.
Covering the damage with joint compound may hide the defect, but it does not restore the fixing strength.
How to correct an overdriven screw
Follow the approved repair method for the selected board system.
In general:
1. Confirm that the screw has damaged the paper.
2. Locate sound framing nearby.
3. Install a replacement screw in an approved nearby position.
4. Drive the replacement to the correct depth.
5. Confirm that the board is tight against the frame.
6. Repair the damaged surface during finishing.
Do not repeatedly install new screws into the same damaged area.
Underdriven Drywall Screws
An underdriven screw has not been seated deeply enough.
The screw head remains level with or above the board surface.
Signs of an underdriven screw
• Screw head can be felt above the surface
• A straightedge catches on the screw
• A joint knife touches the head
• The board is not pulled tight against the frame
• The fixing remains visibly raised
• Joint compound cannot be applied smoothly
Looking for reliable drywall screws for your next project or bulk requirement?
🟨 Request Bulk Quote
📘 Download Product Catalogue
📦 Explore Our Product Range
📞 Talk to Our Sales Team
Common causes of underdriving
• Insufficient tool pressure
• Low driver power
• Weak battery
• Worn bit
• Dense timber
• Incorrect screw length
• Angled installation
• Stopping too early
• Failure to engage the framing
Why underdriven screws are a problem
A raised screw head may interfere with:
• Joint compound
• Sanding
• Painting
• Surface finishing
• Final wall appearance
It may also indicate that the board has not been pulled firmly against the framing.
How to correct an underdriven screw
Before driving it deeper, check:
• Whether the screw has entered the framing
• Whether the board is tight against the frame
• Whether the screw is spinning
• Whether the bit is seated properly
• Whether the screw is bent or damaged
If the screw is correctly engaged, drive it carefully until it forms a shallow recess.
If it continues spinning, remove it and install a replacement into sound framing nearby.

Correct Drywall Screw Depth for Walls
For wall installations, screws should pull the board firmly against the studs without damaging the paper.
Before driving screws, confirm:
• Stud positions are marked
• Board edges are supported
• The board is aligned
• The correct screw type is selected
• Screw length suits the board thickness
• The board is held firmly against the framing
Wall installation sequence
1. Position the board against the framing.
2. Confirm that it is flat and properly supported.
3. Start fastening according to the approved installation sequence.
4. Drive each screw straight into the stud.
5. Stop when the head creates a shallow recess.
6. Inspect the surrounding paper.
7. Correct missed, loose or damaged fixings before finishing.
A screw driven at an angle may not seat evenly and can damage one side of the paper.
For timber-framed applications, refer to the guide on coarse-thread drywall screws for wooden studs.
Looking for reliable drywall screws for your next project or bulk requirement?
🟨 Request Bulk Quote
📘 Download Product Catalogue
📦 Explore Our Product Range
📞 Talk to Our Sales Team
Correct Drywall Screw Depth for Ceilings
Ceiling installations require careful control because the board remains overhead.
The board should be supported firmly against joists, battens or metal channels while the screws are driven.
If the board is not held tightly against the framing, the screw head may appear correctly recessed even though a gap remains behind the board.
Before fixing ceiling drywall, confirm:
• Framing positions
• Board thickness
• Board orientation
• Correct screw length
• Approved drywall screw spacing
• Temporary lifting or support method
• Edge and field fixing pattern
Important ceiling checks
• The board does not sag between fixings
• Each screw enters the framing
• Every head is slightly recessed
• Paper facing remains intact
• No gap remains behind the board
• Spinning screws are replaced
• Damaged fixings are corrected before finishing
Wall and ceiling requirements should always be checked separately.
Driving Depth on Wooden Studs
Coarse-thread drywall screws are generally used with suitable wooden studs because their deeper threads engage timber fibres.
Correct depth still depends on controlling the screw head at the board surface.
Before installation, inspect the timber for:
• Moisture
• Splits
• Twisting
• Damaged edges
• Existing stripped holes
• Soft or weakened areas
• Poor alignment
Screw suddenly drives too deep
This may happen when:
• Timber is soft
• The board paper is damaged
• Excessive pressure is applied
• Tool speed is too high
Screw stops before reaching the correct depth
This may happen when:
• Timber is dense
• The screw is damaged
• The driver bit is worn
• The screw is installed at an angle
• The selected screw is unsuitable
Reduce speed as the head approaches the board surface and stop immediately when the correct recess is formed.
Driving Depth on Metal Studs
Fine-thread drywall screws are generally used with compatible light-gauge metal studs.
The screw must penetrate and engage the metal before the head is seated.
Common metal-framing problems
• Screw spins without tightening
• Point slips across the metal surface
• Head remains raised
• Driver bit slips from the recess
• Screw strips the metal
• Board is not pulled tight against the stud
If a screw continues spinning, it may have missed the framing or stripped the metal.
Do not continue driving it deeper into the gypsum board. Remove it and install a suitable replacement into sound framing.
Some thicker metal applications may require a drill-point screw. Selection should follow the approved framing and board specification.
For more detail, see the comparison of fine-thread vs coarse-thread drywall screws.
Looking for reliable drywall screws for your next project or bulk requirement?
🟨 Request Bulk Quote
📘 Download Product Catalogue
📦 Explore Our Product Range
📞 Talk to Our Sales Team
Driver Bit and Depth-Control Settings
Correct tool setup can reduce both overdriving and underdriving.
A drywall screw gun or suitable depth-setting attachment can help maintain consistent results.
Use the correct driver bit
The bit should:
• Match the screw recess
• Fit securely
• Be free from excessive wear
• Remain aligned while driving
• Transfer torque without slipping
A worn bit may damage the screw head and make depth control inconsistent.
Test the depth setting
Before beginning the full installation:
1. Test the tool on spare board and framing.
2. Drive several screws.
3. Inspect the recess depth.
4. Check the paper facing.
5. Adjust the depth control if needed.
6. Repeat until the result is consistent.
The setting may need adjustment when changing:
• Board thickness
• Screw type
• Screw length
• Framing material
• Tool speed
• Battery condition
Control speed near the surface
The screw may be driven quickly at first, but the installer should maintain control as the head approaches the board.
Excessive speed at the final stage can tear the paper before the operator reacts.
How to Check Drywall Screw Depth
Inspect every board before applying joint compound.
Visual inspection
Look for:
• Raised screw heads
• Deep holes
• Torn paper
• Gypsum dust
• Missed framing
• Irregular fixing lines
• Loose board areas
Touch inspection
Run a hand carefully over the board surface.
A raised screw head may be easier to feel than to see.
Straightedge or joint-knife check
Pass a straightedge or joint knife across the fixing.
It should move over the recess without catching on the screw head.
Board-contact check
Press gently around the fixing point.
The board should remain tight against the framing without movement.
Looking for reliable drywall screws for your next project or bulk requirement?
🟨 Request Bulk Quote
📘 Download Product Catalogue
📦 Explore Our Product Range
📞 Talk to Our Sales Team
How to Correct Incorrectly Driven Screws
Raised screw with proper engagement
Drive it slightly deeper until the head forms a controlled recess.
Spinning screw
Remove it and install a replacement into sound framing.
Overdriven screw with torn paper
Install a replacement fixing in an approved nearby position.
Screw that missed the stud or channel
Locate the framing and install a replacement correctly.
Damaged screw head
Remove the damaged screw using a suitable method and replace it.
Loose board around the fixing
Check for:
• A gap behind the board
• Missed framing
• Damaged board
• Unstable framing
• Incorrect screw length
Correct the underlying cause before adding more fixings.
Common Drywall Screw Driving-Depth Mistakes
1. Driving until the paper breaks
The screw should create a shallow recess, not tear through the paper.
2. Leaving the head above the surface
Raised heads interfere with finishing and may indicate incomplete engagement.
3. Continuing to drive a spinning screw
A spinning screw may have missed or stripped the framing.
Driving it deeper only damages the board.
4. Applying excessive pressure
Too much pressure can cause sudden overdriving.
5. Using a worn driver bit
A damaged bit can slip, strip the screw head and reduce control.
6. Driving at an angle
Angled screws may not seat evenly and can damage the paper.
7. Failing to support the board
A gap behind the board may remain even when the head appears recessed.
8. Covering defective fixings with compound
Joint compound hides the defect but does not correct the fixing problem.
9. Using the wrong screw length
A screw that is too short may not engage the framing properly.
10. Skipping final inspection
Incorrect depth is much easier to correct before finishing begins.
Looking for reliable drywall screws for your next project or bulk requirement?
🟨 Request Bulk Quote
📘 Download Product Catalogue
📦 Explore Our Product Range
📞 Talk to Our Sales Team
Relationship Between Driving Depth and Screw Pops
A screw pop is a visible defect around a drywall fixing after finishing.
It may appear as:
• A small circular bump
• Cracked joint compound
• A visible screw head
• A shallow depression
Incorrect driving depth can contribute to screw pops.
Overdriven fixing
If the paper is torn, the fixing may not support the board correctly.
Underdriven fixing
A raised screw head may move or remain visible beneath the finish.
Other contributing factors
Screw pops may also result from:
• Framing movement
• Wet timber
• Gaps behind the board
• Missed studs
• Incorrect spacing
• Loose fixing points
• Building settlement
• Temperature or moisture changes
Correct depth is therefore one part of a complete installation system that also includes proper spacing, framing condition and board support.
Looking for reliable drywall screws for your next project or bulk requirement?
🟨 Request Bulk Quote
📘 Download Product Catalogue
📦 Explore Our Product Range
📞 Talk to Our Sales Team
Correct Driving-Depth Checklist
Before joint treatment begins, confirm:
• The correct screw type was used
• Screw length suits the board and framing
• Every screw enters the framing
• Fixing lines are straight
• Screw heads are slightly recessed
• Paper facing remains intact
• No screw heads remain raised
• No screws continue spinning
• Overdriven fixings have been corrected
• Missed framing has been corrected
• The board is tight against the frame
• Walls and ceilings were checked separately
• The complete surface was inspected
Frequently Asked Questions
How deep should drywall screws go?
Drywall screws should sit slightly below the board surface and form a shallow recess without tearing the paper facing.
Should the drywall screw head be flush?
The head should normally be slightly recessed rather than completely flush or raised. The recess provides space for joint compound.
How do I know if a drywall screw is overdriven?
A screw is overdriven when the paper around the head is torn or the head has entered deeply into the gypsum core.
What should I do with an overdriven screw?
Follow the approved repair method and install a replacement fixing into sound framing nearby.
Can joint compound repair an overdriven fixing?
Joint compound can cover the surface damage, but it does not restore the strength of the damaged fixing point.
What is an underdriven drywall screw?
An underdriven screw remains level with or above the board surface and may interfere with finishing.
Why does a drywall screw keep spinning?
The screw may have missed the framing, stripped the metal, entered a damaged hole or failed to engage properly.
Should I keep driving a spinning screw?
No. Remove it, locate sound framing and install a suitable replacement.
Is drywall screw depth different for walls and ceilings?
The desired surface seating is similar, but ceiling boards require careful support and may use different spacing, lengths and framing systems.
Can incorrect screw depth cause screw pops?
Yes. Overdriven and underdriven screws can contribute to movement and visible defects, although framing movement and other installation conditions may also be involved.
Final Takeaway
Correct drywall screw driving depth means creating a shallow recess below the gypsum-board surface while keeping the paper facing intact.
A secure fixing should:
• Engage the framing
• Pull the board tight
• Sit slightly below the surface
• Avoid tearing the paper
• Remain suitable for joint finishing
Overdriven screws can damage the paper and weaken the fixing point. Underdriven screws can interfere with finishing and may leave the board loose.
The best results come from using the correct screw type, suitable length, controlled driver settings, proper board support and a complete inspection before joint compound is applied.
Looking for reliable drywall screws for your next project or bulk requirement?